Friday 31 August 2012

Best Day/ I'm not a Taylor Swift Junky!

If you read my latest blog, you would know that I am sick. Fortunately, I am feeling much better - thanks to my awesome stew ( go check it out) - but I am doing a mono day to help my system get back into a good routine. Therefor, I have no pictures to post or things to blog about, unless I post some old recipe or something which I might do.. but point is I thought it would be a good time to do a video.

I am singing Best Day by Taylor Swift, which is the only song I know by her, and I don't even know how to play it on guitar...well I could if I wanted to, but I learned it on my uke, so what I am trying to say here in this totally run on, grammatically incorrect sentence is I am NOT a Taylor Swift junky (I have nothing against her though - yay t-swift). Anyhow, enjoy, comment, and ignore the sick sound of my throat because I am still sick.

Ukelele-ing,
Julia

p.s. I just showered so ignore my face and hair pelezz, shanks! C:

Thursday 30 August 2012

Sick Julia Stew

I hate being sick. I especially hate when you have a cold, that is accompanied by a stuffed up nose that actually hurts it is so stuffed, a cold body, and not to mention a throbbing headache that no amount of water, Advil, or head massages can cure. Yes, I am sick and suffering from all of the above symptoms. Despite my attempts to cure all of my symptoms, I still feel like someone ran over me with a car. However, I did make myself an amazing vegan stew that really gave me temporary relief from my symptoms - the chills, the nose, and the headache - better than any bottle of pills.

Here is the secret to an amazing stew that will truly help kick the sick out of you..

1 cup of vegetable broth
1 1/2 cups of water
1 cup of cooked kale
6 Baby carrots
1/2 cup Alfalfa sprouts (optional)
1/2 zucchini spirolized
1/4 cup tomato puree
2 tbsp red onion spirolized on finely chopped
1/3 cup enoki mushrooms (champignon mushrooms, or just any other mushroom of your choice)

First, let's talk the alfalfa sprouts and the enoki mushrooms. You are most likely unfamiliar with these foods, and are thinking you are going to have to go to some scary health food store where the owner has pink hair down to her hips and a long skirt, but, you won't have to. You can find both of these ingredients in practically every store. I shop at Sobeys, and let me tell you their selection is AWEFUL. If you cannot find them, for what ever reason, forget about the alfalfa sprouts- or substitute with endive or something green- and use a different mushroom.

Sprouts (above); Enoki (Below)


Now to get cooking. Poor in the broth and the water into a pot and turn on high. I make my own vegetable broth, so if you are buying it, watch out for the salt!!!!! Eventually, I will post about how to make vegetable broth...or at least..now I will. Anyhow, add in the onion and tomato puree, and once it comes to a boil lower the temperature to medium so it just simmers. Add in your carrots and let them cook for 3 minutes. Than, add in your alfalfa sprouts and cooked kale. Wait about 2 minutes and than add in the mushrooms. Once the mushrooms look cooked, or taste cooked, turn off the heat and add in the zucchini. You leave the spirolized zucchini for last because you do not want it to turn to mush, and the heat of the stew will just cook them enough.

Finally, finish off the entire pot, because it only has 125 calories - yes the entire pot- so enjoy and fill your tummy (calories may vary depending on the brand of broth however, mine is about 15 calories a cup).

Watching Julie and julia with my stew,
Julia

Wednesday 29 August 2012

A Mom's Birthday Cake

Yesterday was my mother's birthday, and of course, that meant the opportunity/requirement for me to bake something. I was going to bake a vegan cake, but instead I decided since the meal was vegan she should be allowed to have her buttery cake which she so dearly loves. I made a simple vanilla cake but spiced it up a bit, and went a little more health on the toppings.

Instead of decorating it with fondant and icing like I usually do, I decided to play down the sugar and incorporate fruit instead. First on the bottom, before I poured in the batter, I made a bottom nut crust. It was made up of..
3/4cup walnuts chopped in a food processor
3/4 almonds chopped in a food processor
5 dates chopped in the food processor
1 tbsp canola oil
2 tsp cinnamon
1 tsp allspice
1 tsp nutmeg
2 tbsp maple syrup

All mixed together and firmly pressed down on the bottom of the pan. I than poured the batter onto of that. When the cake was done was done, I cut a shallow bowl about an inch into the cake going all the way around. In here I filled it with..
5 peaches browned in a pan with canola oil and..
1 tbsp brown sugar
2 tsp cinnamon
1 tsp allspice
1 tsp nutmeg
1/2 cup dates soaked and blended into a paste with water and 1 tsp cinnamon.

I than, to finish it off, I chopped up 1/4 cup of walnuts and 1/4 pecans with 1 tsp cinnamon (in a food processor), and sprinkled it over the top.

Everyone loved it and said that it was the best I had ever made flavour wise of a cake. My dad loved it too, and he hates cake and sugary things. So I was very happy with it, and I encourage others to try it out. The vanilla cake recipe I got was form a Cake Boss book, which I'll attach the link for.

Enjoy you non Veganers!
Julia

Link:
www.chapters.indigo.ca/books/Baking-Cake-Boss-Buddys-Best-Buddy-Valastro/9781439183526-item.html?ikwid=cake+boss&ikwsec=Home

http://www.rd.com/food/the-cake-bosss-vanilla-cake-recipe/

Cooking to the Beat of Beet Salad!

Beets are my best friend. Honestly, raw, cooked, with the skin, without the skin, I will eat them however.  If I am not eating them alone, then I usually put them in a salad. I'm going to share this recipe I made that is a really fresh salad, that is raw vegan, and beyond healthy for you. If you don't fancy beets, well you will after this.

All you are going to need is..
6 small- medium beets
1/2 can chickpeas 
5 Small radishes 
1/4 red onion 
2 green onion springs
2 tbsp mustard seeds
3 tbsp lemon juice
4 tbsp Vinegar
A handful of Sunflower seeds
A handful of pumpkin seeds

First, using a knife, carefully cut off the skin of the beets, as they can sometimes be bitter. Chop the beets up into cubes and place them in a bowl. Next, cut the ends off the radishes and slice them in halves, adding them too to the bowl. Than, using scissors, chop the green onion and add them to the bowl along with the mustard seeds, sunflower seeds, pumpkin seeds, and chickpeas. Mix them together and add the lemon juice and vinegar, mixing that as well. Finally, dice the red onion, or using a spirolizer spirolize it, and sprinkle on top of the mixture. Dig in!

Eating beets to the beat,
Julia

Tuesday 28 August 2012

Follow You Into the Dark Cover


Follow You Into the Dark is one of my favourite songs of all time. I don't know why, and I am not one of those people that likes sappy love songs but for some reason it is my life song. I remember once having this guy who liked me ask me what my favourite song was and he'd learn it and play it for me on his guitar. When I told him it was this song, he said to me "Well, I don't really like that song how about another"....let's just say we don't talk anymore :3 It is such a beautiful song, and I hope I do it justice. The guitar is quite so I am sorry for that, but my fingers were killing me so I could not do it again.

Love some feed back,
Julia

p.s. sorry for the slow start in the beginning and my hair...and face.. :D

Raw Vegan Dinner Platter #1


So last night was my mom's birthday, and my dad asked me if I would plan the dinner, making all of the food - except for the chicken he will make- vegan. The last couple of times that I've made dinner, I have also made vegan appetizers. Last night, I used two different original recipes. The first being my 'Portobello Mushroom Bread and Butter' and the second 'Pine Nut Pesto Cucumber Bowls'. They are both very easy to make and super yummy. They are raw vegan friendly too, and people who are not vegan will love them and not miss out on the meat and cheese apps.

For the Portobello Mushroom dish, you'll need...
1 or 2 big portobello mushrooms (depending on how many you want to make)
1/2 a ripe avocado (will do 2 mushrooms)
Crumbled cashew nuts (about 1/2 a cup for 2 mushrooms or 1/4 for 1)
1/2 cup cherry tomatoes (for 2 mushrooms again, or 1/4 for 1)
Capers

First, take your mushrooms and put a layer of avocado on the inside of the mushroom going around the stem. Next, sprinkle your cashew nuts on the avocado (as many as you like). Than, cut your cherry tomatoes either in half, or into three pieces - which I find works better- and layer them onto of the nuts and avocado. Put a few capers on top of the tomatoes and repeat for the second mushroom. See, easy!!


For the cucumber dish you'll need..
1 long cucumber
3/4 cup pine nutes
1/4 cup basil pesto
Water
1 tsp garlic powder
1 tbsp lemon juice

In a blender, blend the pine nuts and a little bit of water until it is a thick paste. Add in the pesto, garlic, and lemon juice. If you feel you need to add more pesto, lemon, or garlic because the taste is too dull for your likings, go ahead. Cut the cucumber in thick slices (about 3/4ths of an inch). Using a knife, make a little bowl on the top of the cucumber, but do not cut all the way through. Scoop some of the pesto and pine nut mixture into the cucumber bowl. Decorate with little pieces of cucumber and pine nuts.
Enjoy!

Always thinking of music and food,

Julia

Sunday 26 August 2012

Cooking to the Beat of Gnocchi!!

Gnocchi...yum:)

I do not eat pasta often, because it doesn't like to agree with my stomach, but when I do, and if I do, I like it to be worth the pain. Today I made Gnocchi for my family, that yes is vegan, but not because I used a modified recipe, it just so happens to not contain animal products in it. I served it        with a light tomato and rosemary sauce, since the pasta is so dense.

All your going to need is...            (makes four trays of gnocchi)
                                                      10 medium yellow/gold potatoes
Flour

2 onions
4 garlic cloves
ground pepper
1 can of diced tomatoes
1/2 can of pureed tomatoes
5 stems of rosemary (maybe more depending on your taste)
Canola oil

First, boil the potatoes for about 30min. When they are done, you should be able to stick a knife or fork right through them without any resistance. Than, run them under cold water while removing the skin. The skin will come right off so it will be really easy. Put the pealed potatoes in a bowl and mash them up so they are super smooth. Refrigerate them for 15 minutes.


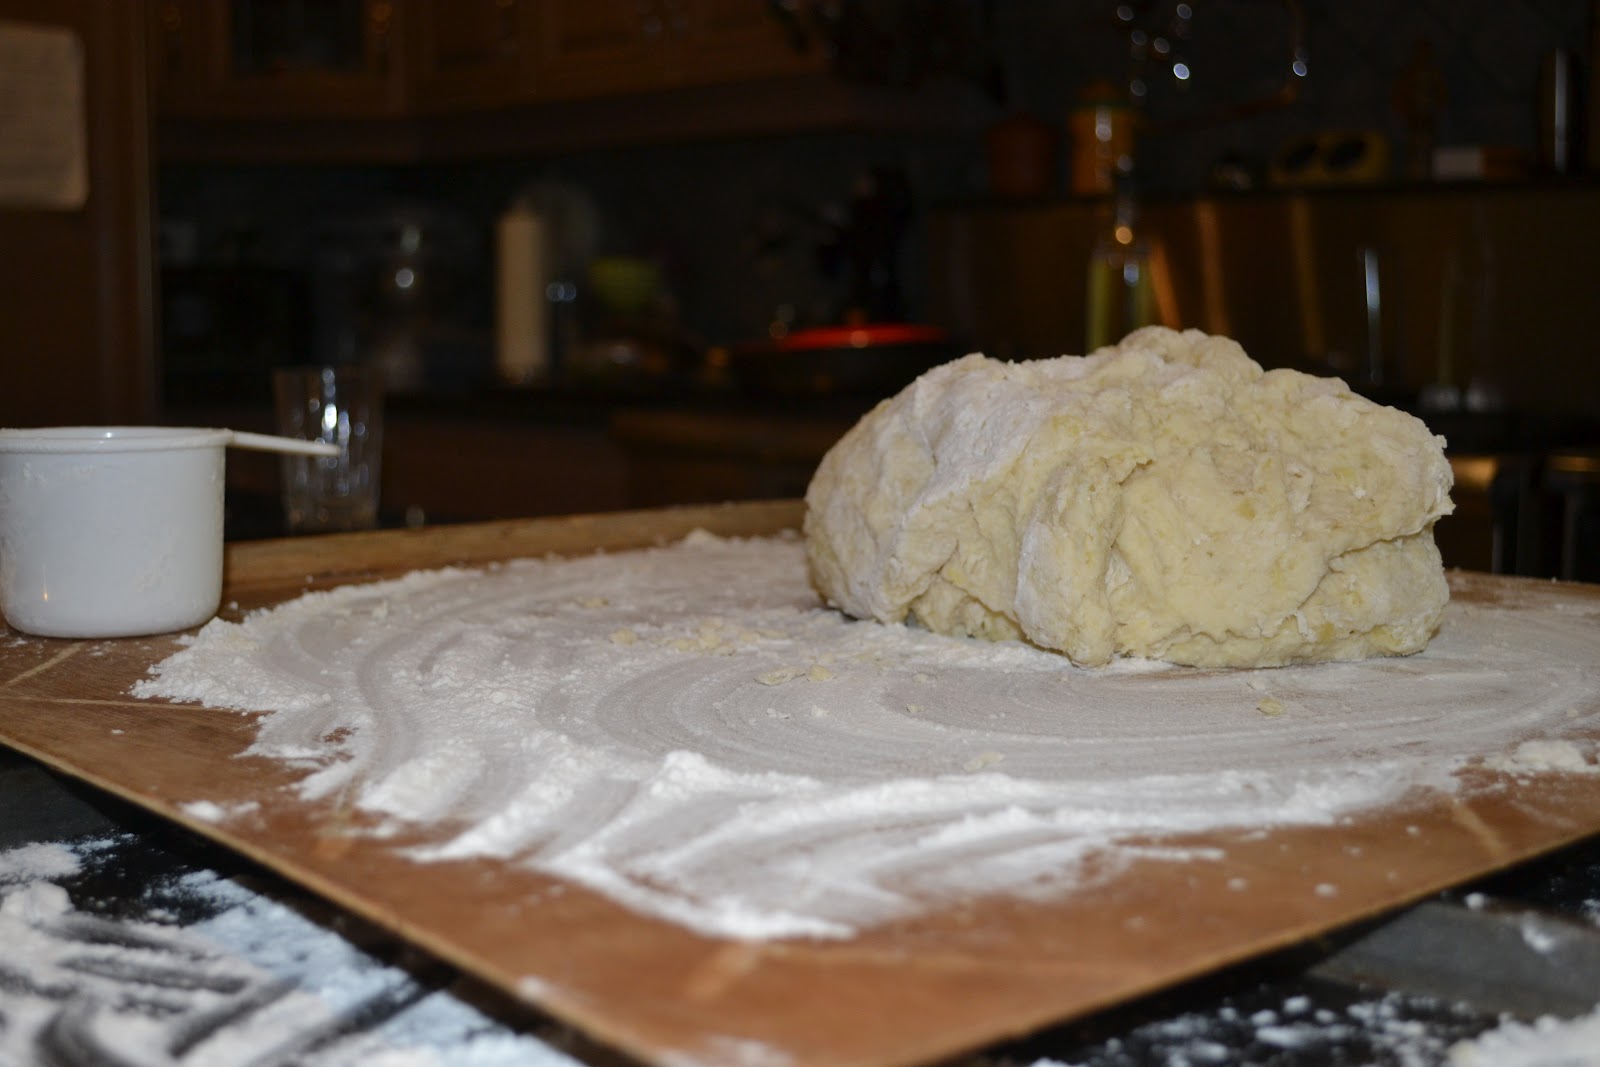
Next, put them to one side of the bowl, and fill the other side with flour. Mix the two together until you get a dough that you can work on a surface, and please feel free to add as much flour as you need so it is not sticky. Trust me when I say you will need a lot of flour. Once the dough is formed, work it a bit to make sure it is mixed on a counter or 
board that has A LOT of flour on it.


Begin to take little handfuls off and roll them into strips that are about 1/2 an inch thick, or slightly smaller. Line them on a tray for now - this part can be easier if you have another set of hands helping. Once you roll out all the dough, cut them into little pieces.

Now, grab a fork, and roll the gnocchi pieces across it so one side of the pasta has indentations of the fork on it. This gives somewhere for the sauce to stick to. Put the gnocchi on a floured tray.


VIDEO ON HOW TO ROLL THEM:


When you roll them into strips, move form the middle and than outwards. 

VIDEO ON HOW TO ROLL THEM ON FORK:

Don't be afraid to put pressure on them so that you really get nice indentations.


Now, chop the onions and garlic and put them in a pan with the oil (about 3 tbsp)

Add black pepper and the rosemary - pull leaves off the stem and throw out the stems.


Poor in the tomatoes, and once they start to boil, put the heat down to low and put a lid on the pan so the extra water can boil off. Stir every 5 minutes.

Put your gnocchi into a pot of boiling water. Once they all float to the top, cook for another 5 minutes and then take them out. Serve with the sauce and enjoy!


If you have extra gnocchi, freeze them on the tray first, than 
put them in a bag, that way they do not stick. 

Eat up,
Julia.
P.S. the videos were not up loading but I will try to get them up as soon as possible - check again later

Friday 24 August 2012

Cooking to the Beat of Vegan Pin-wheels!


Many people constantly tell me, "Oh, being a vegan must be so hard, you like, can't eat anything! I don't have that much self control. You must be so strong". Well, actually, there is a lot of junk you can eat as a vegan, and a lot of substitutes for junk. Preferably, I like to eat hole foods, and I avoid doing a lot of gourmet vegan recipes, raw or not raw, simply because they are usually high in fats, sugars, and calories. I do however, on special occasions, bake cookies that are vegan friendly. So today I made some Pin-Wheels, which is an awesome recipe that I think you all should try. I do, like always, want you to remember a cookie is a cookie, and that just because it is vegan does not mean it is healthy and that you can eat the whole batch. Refined sugars, oils, and other processed ingredients like white flour are in these cookies, all of which have NOTHING good for your body! So have a few but don't make them a meal, or something you make everyday.

But just for fun, grab ...

1/2 cup soy milk that has been heated in the microwave or on the stove with one tbsp of cornstarch (until thick). You can use almond milk instead, I do, since too much soy has been proven to increase hormone levels that cause various, unwanted symptoms that I don't want to get into..

Vanilla layer:
1/3 cup Margarine **I recommend using canola oil since the saturated fats in margarine from the           hydrogenated oils are so bad for you don't even get me started.
3/4 cup sugar
1/2 tbsp agave nectar or maple syrup 
1/2 of the soy milk and corn starch mixture
1/2 tsp vanilla extract
2 tbsp soy milk 
2 cups flour (although if you need more to form the dough by all means add more)
1 1/2 tsps baking powder

In one bowl, mix together the oil, sugar, and maple syrup with a beater or by hand. Next, poor in the soy milk and corn starch mixture, vanilla, and the additional soy milk. Stir in the flour and baking powder. You should be able to form a dough that is not dry or too sticky; if you need more flour or soy milk to change the texture feel free to. Wrap the dough up in plastic wrap and put it in the freezer.

Chocolate layer:
1/3 cup Margarine ** canola oil 
3/4 cup sugar
1/2 tbsp agave nectar/maple syrup 
1/2 of the soy milk and corn starch mixture
1/2 tsp vanilla extract
2 tbsp soy milk 
2 cups flour (add more if needed)
1/3 cup cocoa powder
1 1/2 tsps baking powder

Follow the same steps as the ones for the vanilla layer, adding in the cocoa with the flour.

After they have been in the freezer for at least an hour, take them out and separately roll them both out so that they each make a rectangle (14'' by 5'' or so). Make sure they are relatively equal, and using a knife cut them so they are perfect rectangles. Then, put the chocolate layer onto of the vanilla. If you role them out onto plastic wrap first (the wrap is on the counter), they will not stick to your counter and you can just pick up the wrap and flip the layer onto of the other. Role them so you get a longer tube rather than thicker. Wrap in plastic wrap and put in the freezer for another 15 minutes.

Preheat the oven to 350 degrees F

Take them out, and using a sharp knife, cut the tube of dough so you get individual cookies. Place them in the oven for 10-12 minutes, but watch them making sure they do not burn. 

Enjoy your cookies,
Julia

Music Blog #1: Against the Grain


Hmm..did Julia actually get the guts to post this video...she did I guess. AHH. It took me forever to convince myself this is okay and that if it really bugs me I'll take it down but yeah....So, this is me...singing on my ukelele, and I am singing City and Colour's Against the Grain. I just learned it, and as you can tell I am obviously reading the lyrics off the screen...so good. Feel free to comment, as long as you are not too mean... :3

Not to confident..
Julia

Before the Vegan Baking #1

Before I became a vegan, I loved to cook and bake too. From back when I was a kid, I have always loved to watch the food network...I don't know why but I have. Now, it is always on in my house, and 95% of the time when you turn on the TV in my house, it is on that channel. I began baking a lot back in November of 2011, when my mom said I could help bake some things for christmas. I made tuns of cookies, and even a few cakes. Not wanted to waste all my non vegan baking works, I decided to share them with you! Here is one of the cakes I made. It was a vanilla cake with blueberry vanilla filling!

I took the recipe for this cake from a Cake Boss book, and let me tell you, from what I remembered it was some of the best vanilla cake I ever had, and I hate vanilla. The decorating idea I am not sure where I got it, but based on how much food network I watch, I could have been inspired anywhere. This cake is defiantly one of my favourite baking works I have done....now just to recreate it so it's vegan...

Just sharing,

Julia

Tuesday 21 August 2012

Raw Vegan Rice


I know what you are thinking, how can rice be raw? Well, it isn't, but cauliflower is:) That's right, the secret to this recipe is to make cauliflower rice! This is one of my favourite recipes, that until a couple of days ago, I had no idea others used cauliflower as grain substitute. I originally would grate my cauliflower so that it looked like couscous. When I searched up raw vegan rice alternatives the other day, cauliflower rice popped up. Basically it is the same as what I was doing, except for the name change. So to all who are raw vegan, or don't digest gluten or grains well, this is the recipe for you!

To do this you'll need,
1/2 head cauliflower
1/3 cup red kidney beans
2 green onion stalks
1 Shallot (like a small red onion)
1/4 cup Baby tomatoes
1 tbsp lemon juice
1/4 cup vinegar

First, chop your cauliflower into bite sized pieces. Than, put them in your food processor and pulse it until they are broken down into a wet powder (should resemble couscous). Poor this into a dish with the kidney beans, lemon juice, and vinegar. Next, put the shallot into the food processor (or chop by hand- just be sure to chop them small so you don't get too strong of a flavour) and pulse it until it is into small cubes. Add the chopped shallot to your mixture. Chop your baby tomatoes into quarters, and using scissors, cut your green onion. Mix all together and enjoy!!

This is truly awesome goodness,

Julia

Raw Vegan Breakfast Getting' Fancy


This morning I treated myself to small, beautiful raw vegan crepes. I served them with oatmeal almond cream, fruit, and strawberry maple syrup. What a way to start the day! They were easy to make, and are 100% healthy for you.

So join me by grabbing..

2 Bananas (medium in size)
Cinnamon
Vanilla extract

1 oz. soaked almonds (soaked for 8 hours)
1/4 cup soaked whole wheat oats (soaked for 8 hours)

4 Big strawberries
1/2 tbsp maple syrup

First, the night before, soak your almonds and your oats. As well, blend up the two bananas with about a tsp of cinnamon and a tsp of vanilla extract. Poor them onto non-stick sheets in your preferred size of crepes, keeping them relatively thin. Pop them in the dehydrator for 8 hours at 110 degrees F. If you don't have a dehydrator, you can do this in an oven. Depending on whether or not your oven goes to this temperature, since the lowest on mine is 140 degrees F, adjust the time slightly. Your probably looking at about 2-3 hours less, but remember if you do them in the oven at 140 degrees F, you will be cooking them and they will not be considered raw anymore.

The next morning, remove them off the non stick sheets, turn them over and place them on the mesh screen, putting the tray back in the dehydrator. While they crisp up, blend up your oats, almonds, some cinnamon and vanilla extract. Set that aside and blend up the strawberries with the maple syrup. Remove the crepes and serve with the cream, sauce, and some fresh fruit! Enjoy!


Monday 20 August 2012

Date night dessert


Date night! Yummy! I don't mean awkward candle-lit meal over chinese food, I mean, date as in the fruit! Now that is something to get excited for! Dates are AWESOME for desserts, and I recommend them to anyone who has a serious sweet tooth. They are so sugary it is unbelievable, and taste great with practically all foods.

Last night, I made my delicious date spread to fill some vegan cookie sandwiches! So, I thought I'd share my recipe for an awesome date spread that you can use at breakfast with your oatmeal, as jam, or any with any other recipe that calls for a sweet awakening! It's raw vegan friendly too!

Let's get sugary with....
1 Cup of dates
Water
1/2 medium apple
1/2 tsp Cinnamon

First, soak your dates in a bowl of room temperature water for 4-6 hours. When they feel soft, put them in a blender - without the water- and add the apple. Blend them up adding small amounts of water when your blender begins to struggle; if you don't need to add water, thumbs up to you! Finally, poor the spread into a bowl and stir in the cinnamon. If you want to add more cinnamon, knock yourself out.

I put the spread in-between two vegan sandwich cookies. I got the recipe for the cookies in this awesome vegan cookie book I have. It is a pretty simple recipe and nothing unique (kind of like a short bread, sugar cookie) so I won't post how to make them, unless someone comments and asks for it. I will however put a link to the cookie book I have. I highly recommend it to anyone who loves and misses cookies as a vegan, but I do warn you that vegan or not they are cookies, and are not the best for you. This book was given to me by a very good friend when I became vegan, and I have used it many times since for vegan dinners I have cooked for my family and friends.

So try out the dates! And check out the book!!!!!

Getting sweeter,

Julia
Link: http://www.amazon.com/The-Vegan-Cookie-Connoisseur-Delicious/dp/161608121X

Saturday 18 August 2012

Almond Cheese: Finalizing

Now to continue the cheese! (see earlier post)

So, you have let your cheese ferment for around 12 hours yes? Now it is time to finish it off! Take your cheese, still in the cloth, out of the bowl. Squeeze out as much of the extra liquid that did not drain out into the bowl. You don't want your cheese to be to wet, but moist enough to stick together. Once you think it is drained enough, open up the cloth.

Clump all your cheese together. At this point it is ready to serve. However, if you want to be a little creative and role the cheese in nuts or something of the sort - giving it a decorative outside- go right ahead.


This is my final product. I split the batch into two parts. One is mixed with cinnamon, walnuts, and cranberries (left), and the other with dried parsley, fennel seeds, garlic powder, and sunflower seeds (right). Be creative!!

Through that cheese on fruit,

Julia

Thursday 16 August 2012

Mono Melon

Why melon? I was feeling well...melancholy ;)

What's on the menu for today? A mono day of course! What is a mono day? Well, it means today I am only eating one kind of food, specifically Cantaloupe:) A total of 2 cantaloupe made up my meals today. Why would I do this though? By eating one type of food, especially a high water content food, it allows for your body to detoxify. Fruit is also the easiest food for your body to digest, so it gives your system a break from digesting, and allows it to focus on getting out all those bad toxins. It is really good to do after you have had a day of heavy eating, or you ate to many breads or pastas - in my case nuts that were not soaked- that are clogging up your system and backing everything up.

Give your tummy a break too!

Julia

Almond Cheese: The prep and process


Cheese. A non-vegan friendly spread that I miss fairly often. UNTIL I DISCOVERED THE MOST AMAZING THING EVER. Nut cheeses. Yes that is right, you can make cheese out of nuts! Almonds, cashews, walnuts, pine nuts, even seeds! Today, I thought I'd share with you this awesome vegan cheese that even people who are not vegan will love.

I have made this recipe twice so far with almonds and cashews. Both I served to my parents and friends, and days after my dad kept asking for my NUT cheese, instead of his italian aged cheddar. Thats right, nuts take the win. I am breaking this recipe down into two blogs. This one will contain the prep steps and the processing of the cheese. Tomorrow I will post how to finish the cheese. Please note that this entire process will take you at least a day and a half, maybe more, depending on how you time it. I will also put the link for the video that taught me how to make nut cheeses!

Let's get started with..
1 1/2 cups of almonds - or any nut you desire!
Some water

First, the night before, put your almonds(etc) into a bowl and cover them with water so that they can soak. Nuts are very dehydrated, so you should actually soak your nuts (lol) all the time, so that they are easier for your body to breakdown and digest. The main reason we are soaking them here though is because they will be easier to blend up, and they will me MUCH easier to peel. Even if you are not using almonds, you should soak them so that when you blend them up they become a paste not a powder.

The next morning, drain your almonds and peel them. This is NOT hard! It is super easy, especially if you soaked them for 12 hours over night. Pinch the almonds and they will actually go flying across the room out of the peel- be careful!

Stick your almonds/nuts into a blender and add water so it is just covering the nuts.

Blend them up! You may need to add some more water if your blender gets stuck; don't worry if you do. Your nuts should turn into a nice paste.


Poor the paste onto a cheese cloth. Mine just so happens to be long and rectangular, so I poorer mine lengthwise. If yours is  square, poor it in the middle. Fold up the cloth so the cheese is covered. You will notice a white liquid seeping from the cloth. This is what we want to drain. Place your cheese into a strainer that is sitting in a bowl; make sure the bottom of the strainer is not touching the bottom of the bowl.


Stick something heavy on the cloth (I use jars) so that it speeds up the process. Stick it in a cupboard for 12 hours or more, so that the nut cheese can ferment and strain.

Read tomorrows blog for what happens next!

Always cheesy,
Julia

Links: http://www.youtube.com/watch?v=Tj5t-ln_bDI&feature=related

Wednesday 15 August 2012

Parent belly satisfier

My mom is always coming home later than my dad. This means that despite what the time may be, or how late my mom is, my dad will wait for her. Now this could mean hours, since my mom has no sense of time what so ever. Me being the chef for the week, is left to create appetizers that my dad can munch on until the lady herself arrives. I thought I'd share my appetizer ideas with you all as a way of making me feel like all this extra food I have to make because of my mother's tardiness is for an actual, good reason. Here is one of them for now.

oh, one more thing...Vegan friendly!

Pear crackers; Cashew cheese with walnuts; Cucumber, raison, and mango mini-kabobs 


Cooking to the Beat of Ratatouille

So this week I have been cooking dinner for my parents, and tonight I thought I'd be a little fancy and make them something new! Ratatouille- which I guess is not that fancy when you think about its origin, but hell, it's a pretty dish to look at if you ask me. I found a fairly simple version of it and than made it my own. I have this thing for never really following a recipe, but instead just looking at it and getting an idea of how it looks and the basic ingredients. I'll put the link at the bottom for those who are curious to see where I got my recipe from.


Ingredients:
1 fairly long green zucchini
1 fairly long yellow zucchini
1 red pepper
2 short eggplant
1/3 can of tomatoes - already chopped (you can use fresh to!)
1/3 of a sweet onion
1 garlic clove
Salt and pepper
Olive oil
Sage

Preheat the oven to 375 degrees F

First things first, chop your eggplant into slices (circular, like potato chips). Than, stick them in a strainer, put a little bit of salt on them, cover them with a cloth, and place something heavy on them. BUT WHY you might ask? Well, eggplant can be VERY acidic! And by placing something heavy on them and putting pressure on them, you can get rid of some of the acidity. You should give them at least 45 minutes to sit.

Next, get an oval baking dish (or any other shape you little hearts desire) and poor the tomatoes in. Chop up your garlic and onion and add them as well, spreading them evenly around so it is just a thin layer.

Chop up the rest of the vegetables just like you did with the eggplant. The pepper you can cut the same way, just be sure to take off the top and clean out the inside carefully so you do not break the pepper. Now, you layer them going around the dish so each vegetable is showing just a little; make a pattern with them.


Drizzle some olive oil on top and season with salt and pepper. Put a couple of sage leaves on the top, and cover with parchment paper that has been cut so it fits the oval baking dish and can just rest on top of it. Cook for 45 minutes - more or less depends on you! Serve and enjoy!

I served mine on top of cous cous that I just tossed with some green onion and lemon juice, topped with some greek yogurt (my parents were eating it not me; if your vegan too, just ignore the yogurt!). YUM!!


Always cooking up a song,

Julia

Link: http://smittenkitchen.com/blog/2007/07/rat-a-too-ee-for-you-ee/

Tuesday 14 August 2012

Cooking to the beat of Zucchini Pasta !

Spirolized zucchini with basil tomato sauce!

Time for my first vegan cooking blog! This is a recipe I made myself, although, I am sure I am not the first to do this. It is 100% vegan, gluten free, and can be raw vegan as well, depending on how you go about it! Anyhow, read away, cook, eat, and enjoy!

You will need...
1 medium zucchini
2 medium tomatoes
A handful of basil
1/4 cup water
Seasonings (salt and pepper)
1 clove of garlic
1/3 cup of sun dried tomatoes 

First, spirolize your zucchini. BUT WHAT DOES THIS MEAN? Well, if you don't know what it means, than I am going to assume you don't own a spirolizer...BUT no worries, because you can just make the zucchini into fettuccine strips by using a peeler and just peeling the zucchini until you get down to the core, so you make it into thick strips. However, I highly recommend you buy a spirolizer, so below,  I have two links that will help you out! Moving on though.....So, when spirolizing, if you choose to peel your zucchini, you will end up with all white pasta, but if you do not peel it, no worries it is still edible, you'll just have some green pasta strands, but no big deal. Once you are done spirolizing, put your zucchini in a bowl and leave it aside.


Next, chop up the garlic and tomatoes and put them in a blender. If your blender is having trouble, add the water, but not too much because you do not want a watery sauce. Than, add your sun dried tomatoes, which you may or may not have to chop depending on the strength of your blender. You can also add some seasonings at this point, and blend it up.

Take your sauce and pour it into a pan, NO OIL ADDED. Add in as much basil as you desire and cook on a medium-high heat until your basil is cooked and the sauce has absorber the flavour of the basil (about 5 - 6 minutes). Your tomato sauce should be at a boil, and if it is watery, let it cook for longer until some of the water boils off. Than, turn off the heat, and while the pan is still hot, add in the zucchini and mix it until they are covered in sauce. At this point, they should be warm, and ready to serve!

NOW..if you are a raw vegan, all you have to change is instead of cooking the basil in with the sauce in a pan, just add it to the blender and mix it in that way. Than, you just pour the sauce on top of the zucchini directly from the blender, and nothing will be cooked. 

It is better warm than cold...but both taste great! Let me know what you think, and enjoy!

Listening to way to much Leonard Cohen,
Julia